(验证无问题)Centos7 中安装mysql-5.7.22-1.el7.x86_64.rpm-bundle.tar
从最新版本的linux系统开始,默认的是 Mariadb而不是mysql!这里依旧以mysql为例进行展示
1、先检查系统是否装有mysql
[root@bogon ~]# rpm -qa | grep mysql                        //查收是否安装数据库
qt-mysql-4.8.5-13.el7.x86_64
[root@bogon ~]#  rpm -e qt-mysql-4.8.5-13.el7.x86_64                                //删除老版本数据库

[root@bogon ~]# rpm -qa | grep mysql

这里返回空值,说明没有安装
下载mysql-5.7.22-1.el7.x86_64.rpm-bundle.tar,上传到阿里云。(阿里云ftp搭建在上一篇)
2.解压到指定的文件夹
[root@localhost ~]# tar -xvf mysql-5.7.22-1.el7.x86_64.rpm-bundle.tar
得到文件列表如下:

3.Centos 自带的数据库:
[root@localhost ~]# yum remove mysql-libs
4、因为mysql的依赖关系,依次按顺序解压
[root@localhost ~]# rpm -ivh mysql-community-common-5.7.22-1.el7.x86_64.rpm
[root@localhost ~]# rpm -ivh mysql-community-libs-5.7.22-1.el7.x86_64.rpm
[root@localhost ~]# rpm -ivh mysql-community-client-5.7.22-1.el7.x86_64.rpm
[root@localhost ~]# rpm -ivh mysql-community-server-5.7.22-1.el7.x86_64.rpm --force --nodeps
5、
为了保证数据库目录为与文件的所有者为 mysql 登陆用户,如果你是以 root 身份运行 mysql 服务,需要执行下面的命令初始化
[root@localhost ~]# mysqld --initialize --user=mysql
期间可能会出现如下错误:
①、error while loading shared libraries: libaio.so.1: cannot open shared object file: No such file or directory
解决方法:# yum install -y libaio
②、TIMESTAMP with implicit DEFAULT value is deprec
解决方法:在my.cof [mysqld]下添加 explicit_defaults_for_timestamp=true,再启动就可以了,my.cof是在etc/my.cof下。
③、initialize specified but the data directory has files in it. Aborting.
解决方法:rm -fr /var/lib/mysql 。
6、
[root@localhost ~]# systemctl start mysqld.service
[root@localhost ~]# mysql -uroot -p
会报错:

ERROR 1045 (28000): Access denied for user 'root'@'localhost' (using password: YES)
获取mysql自动生成的随机密码:
[root@localhost ~]# cat /var/log/mysqld.log |grep password 命令
找到:

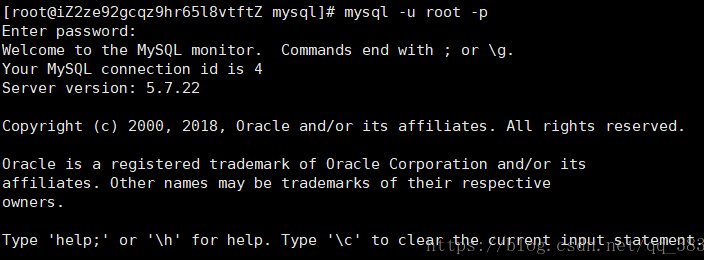
输入命令:
[root@localhost ~]# mysql -uroot -p
然后输入密码
Enter password: uj-og&u%2OO(
然后进入了mysql >

设置新密码:
 mysql >  set password=password('123456');
 Query OK, 0 rows affected, 1 warning (0.00 sec)
set password=password('123456');
exit退出。使用新密码登陆。
完成。
修改访问权限
目的:任何主机通过用户root和密码password11连接到mysql服务器
 mysql > GRANT ALL PRIVILEGES ON *.* TO 'root'@'%' IDENTIFIED BY 'password11' WITH GRANT OPTION;

Query OK, 0 rows affected, 1 warning (0.00 sec)


评论专区
刚看见一个妹子,很漂亮!http://aoyih.ha-yg.com/
有钱、有房、有车,人人都想!http://lof7k.543210.org/
楼主的等级很高啊!http://z30.ty-18.com/